How To Change Nameservers (DNS) Godaddy To Cheapohosting
In this Blog we will walk you through the step-by-step guide of how to change your GoDaddy Nameservers (DNS) by pointing them away from GoDaddy and to a new web hosting provider, in this case Cheapohosting.
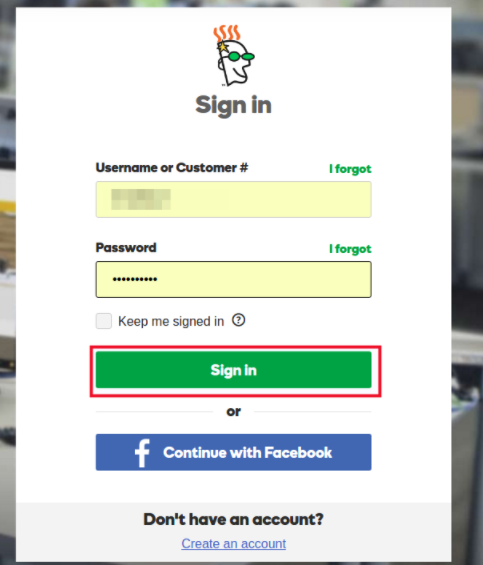
Step 1: Sign in your GoDaddy Account:
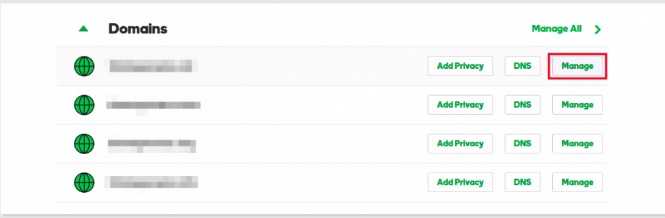
Step 2: Once logged into your dashboard select the domain you want to manage by clicking the Manage button:
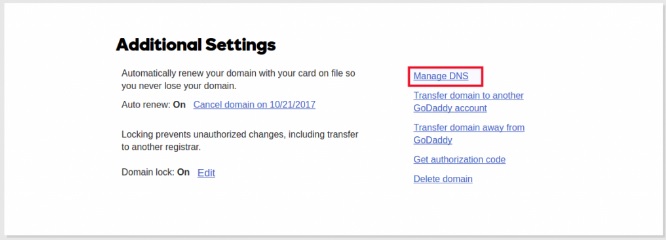
Step 3: Under Additional Settings click Manage DNS:
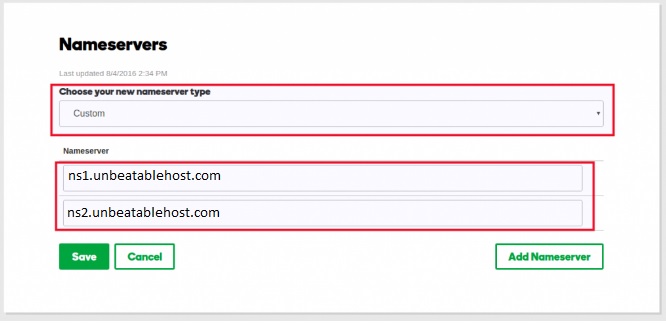
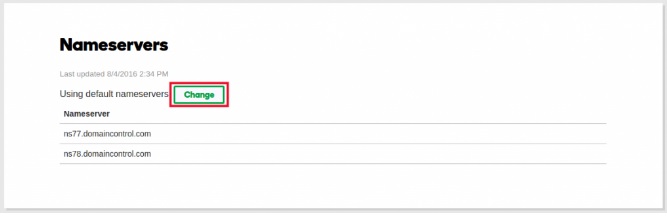
Step 4: Scroll down to the Nameservers section and click on Change:
Step 5: Switch the dropdown from Default to Custom and under Nameservers fill in the Cheapohosting Nameserver information: ns1.example.com and ns2.example.com The nameserver which you received in your registered email id with login details: